Soundtrap only supports EDU Accounts on the School and District subscription plan to integrate Schoology.
This article reviews how to install Soundtrap to Schoology on the district level. The Schoology system administrator will be able to install Soundtrap for all Schoology courses and users via the steps below.
When set up, there will be one Soundtrap for Education account linked to the entire Schoology instance and therefore we only recommend this integration for district wide adoption of Soundtrap.
Contents:
Setup
How to access the Soundtrap app from your Schoology course
How to access the Soundtrap app from the Schoology banner menu
Setup
1.) As a Schoology system administrator, start by logging into Schoology and go to the App center.
2.) Scroll down the list of apps to find Soundtrap.
3.) Once you've clicked on Soundtrap, click on Install App.
4.) Next you'll need to accept that Soundtrap requires information from your Schoology account in order to connect. Click I agree.
5.) Click on Add to Organization if you are Soundtrap EDU owner installing Soundtrap to your entire Schoology district, or click Install for Me for a course-level integration if you are only installing Soundtrap for a few specific Schoology courses.
Keep in mind however, that can only be one Soundtrap for EDU account set up for the entire Schoology instance!
6.) If you are installing on the organization level, you'll need to click on Install/Remove to specify who will gain access to Soundtrap.
7.) Refresh your Schoology page and you will see Soundtrap listed in your Schoology course menu on the left hand side. Click on Soundtrap for the first time and Approve the connection between Soundtrap and Schoology. This will create your Soundtrap user account and will establish the login connection.
8.) Once you've approved, Soundtrap will launch and you now be able to access Soundtrap!
Once the Soundtrap app has been installed into Schoology, there are two ways to access the app. The Soundtrap app will be visible in the the Schoology course menu or may be visible via the Schoology user banner menu.
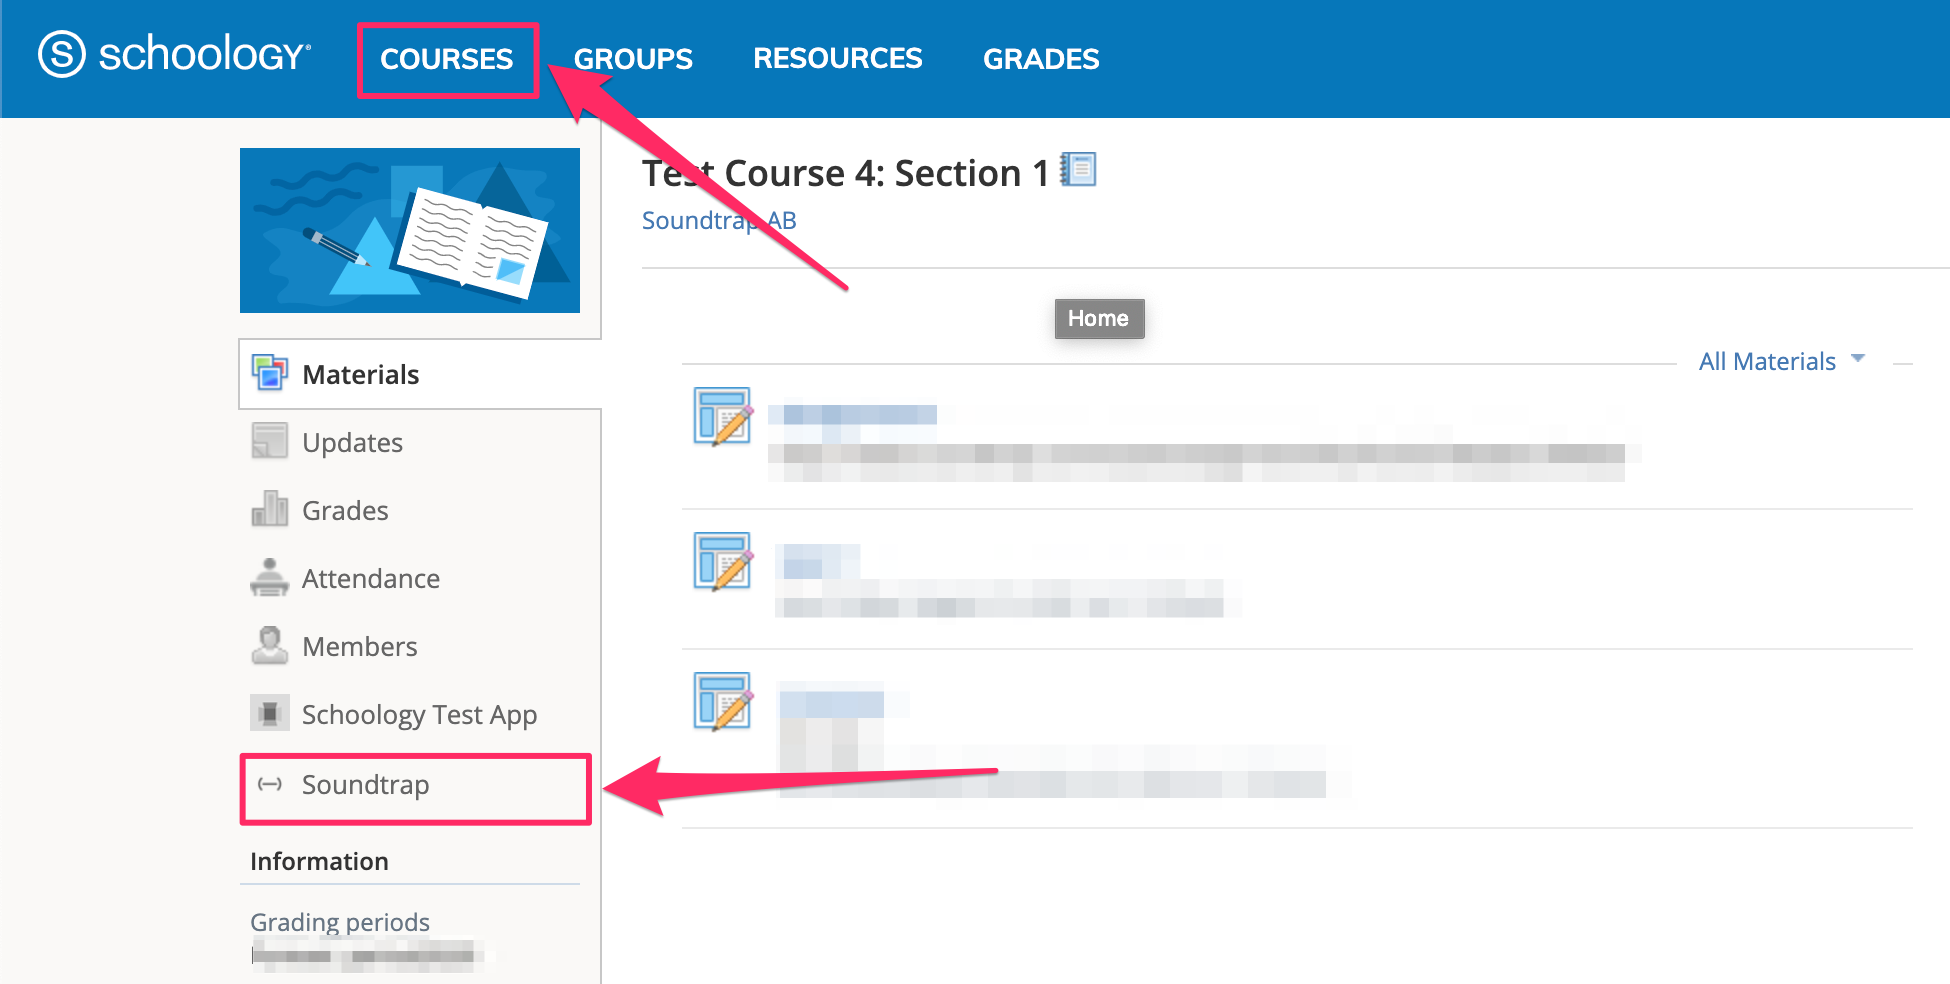
How to access the Soundtrap app from your Schoology course:
Log into your Schoology account > click COURSES > choose a Schoology course > locate the Soundtrap app on the left course menu > click on Soundtrap > launch and approve the app.
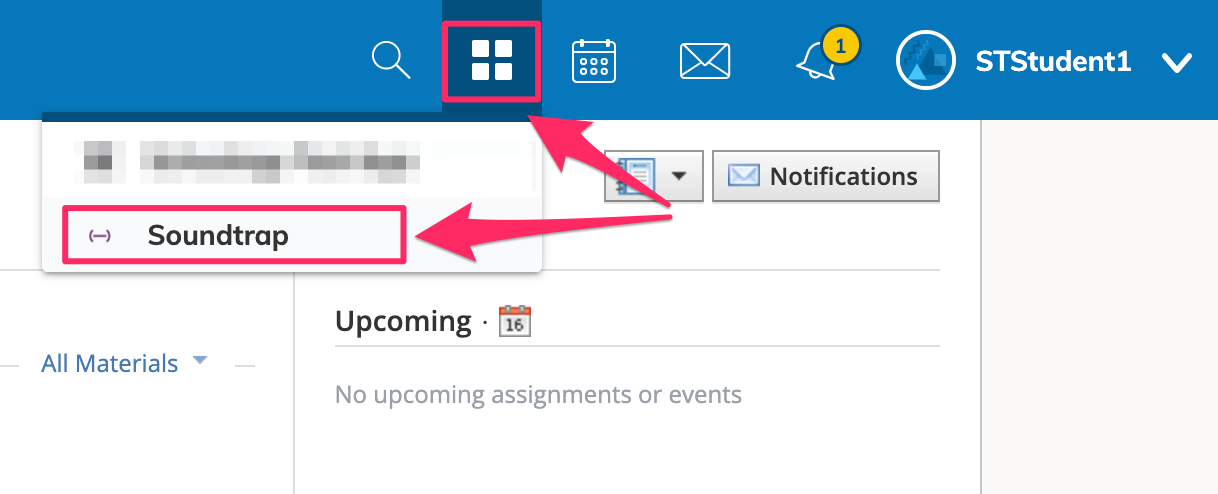
How to access the Soundtrap app from the Schoology banner menu:
Log into your Schoology account > click on the four squares icon in the user banner > see the drop down menu > click on Soundtrap > launch and approve the app.
Comments
0 comments
Please sign in to leave a comment.